
Macarons: Demystifying the French Show-Off (Perforated Mat Method)
Macarons are famous for being finicky, but with the right tools they become surprisingly achievable. This guide breaks down every step – from proper macaronage to the perfect feet – using a perforated silicone baking mat that promotes even airflow and prevents hollow shells. Includes troubleshooting FAQs.
Have you ever tried making macarons only to end up with cracked tops, no feet, or hollow shells? You’re not alone. The key to consistent macarons lies in three things: precise technique, accurate oven temperature, and the right baking surface. A perforated silicone baking mat is the secret weapon of professional patissiers – the tiny holes allow hot air to circulate evenly around each shell, giving you that coveted ruffled foot and smooth dome every time.
Frequently asked questions
Q1: Why do my macarons have no feet?
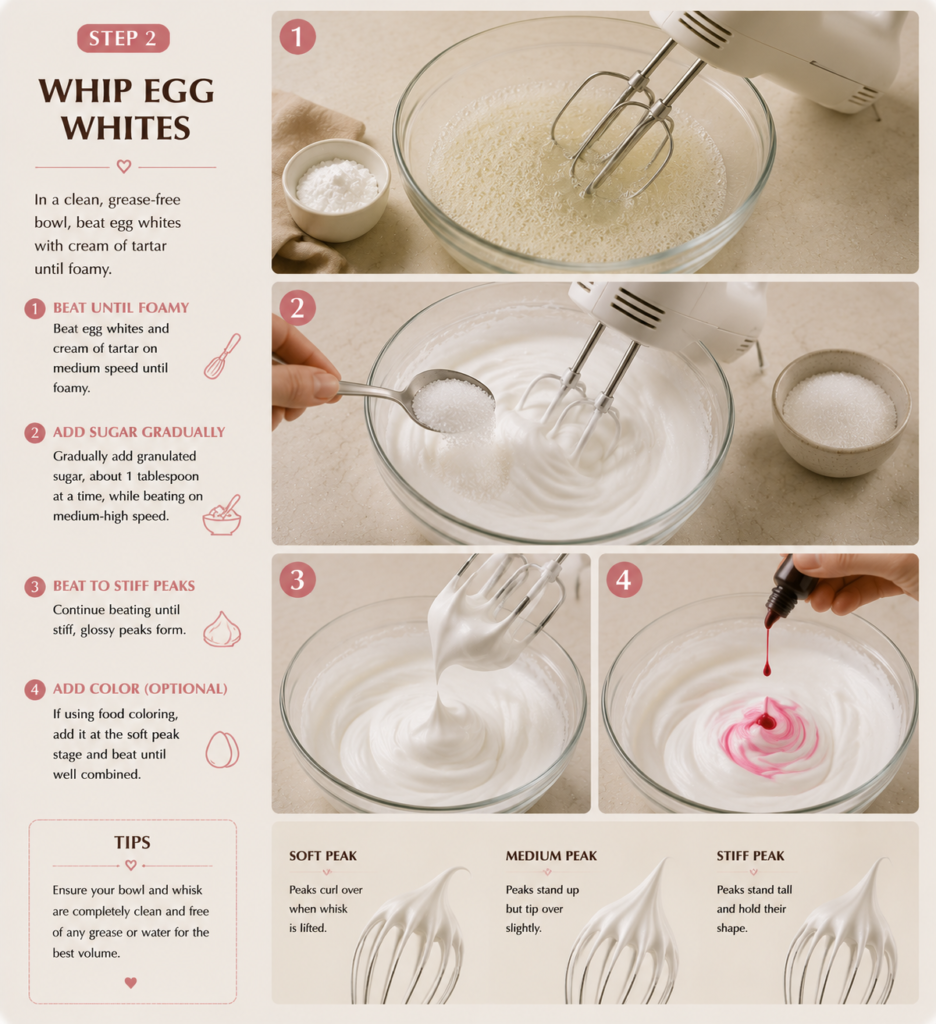
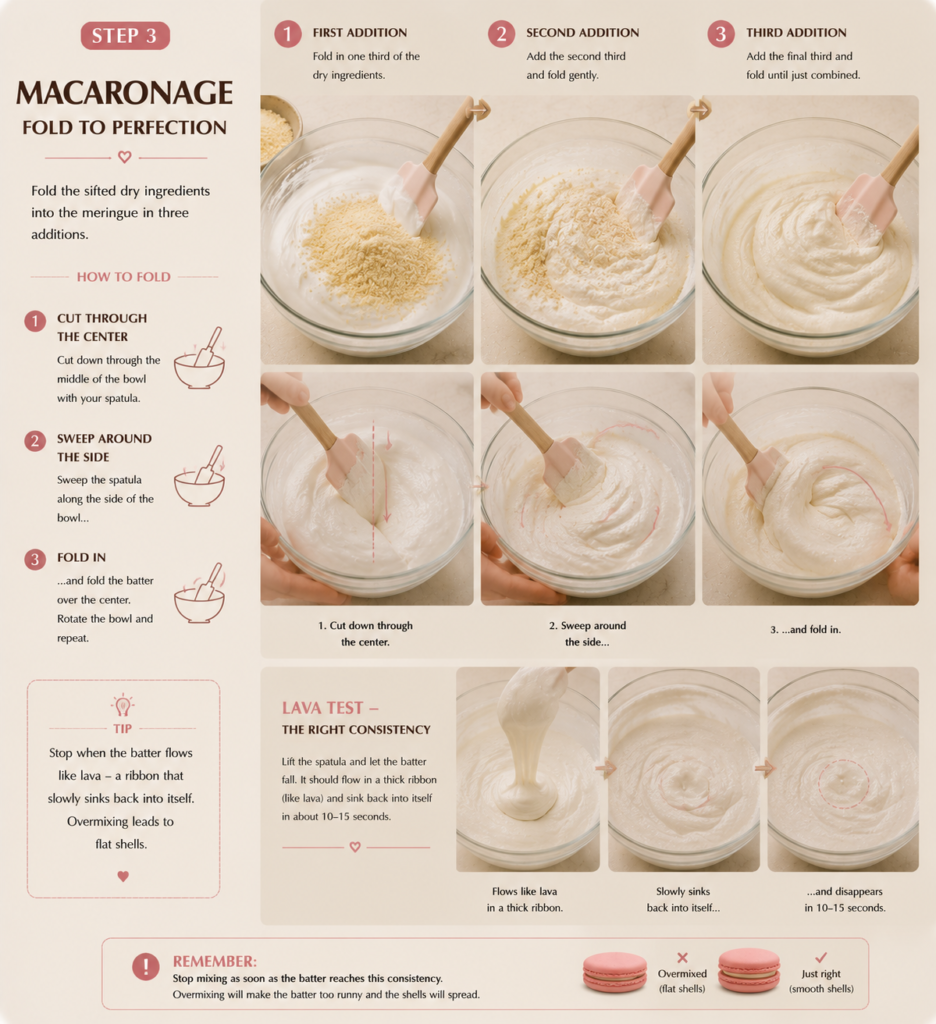
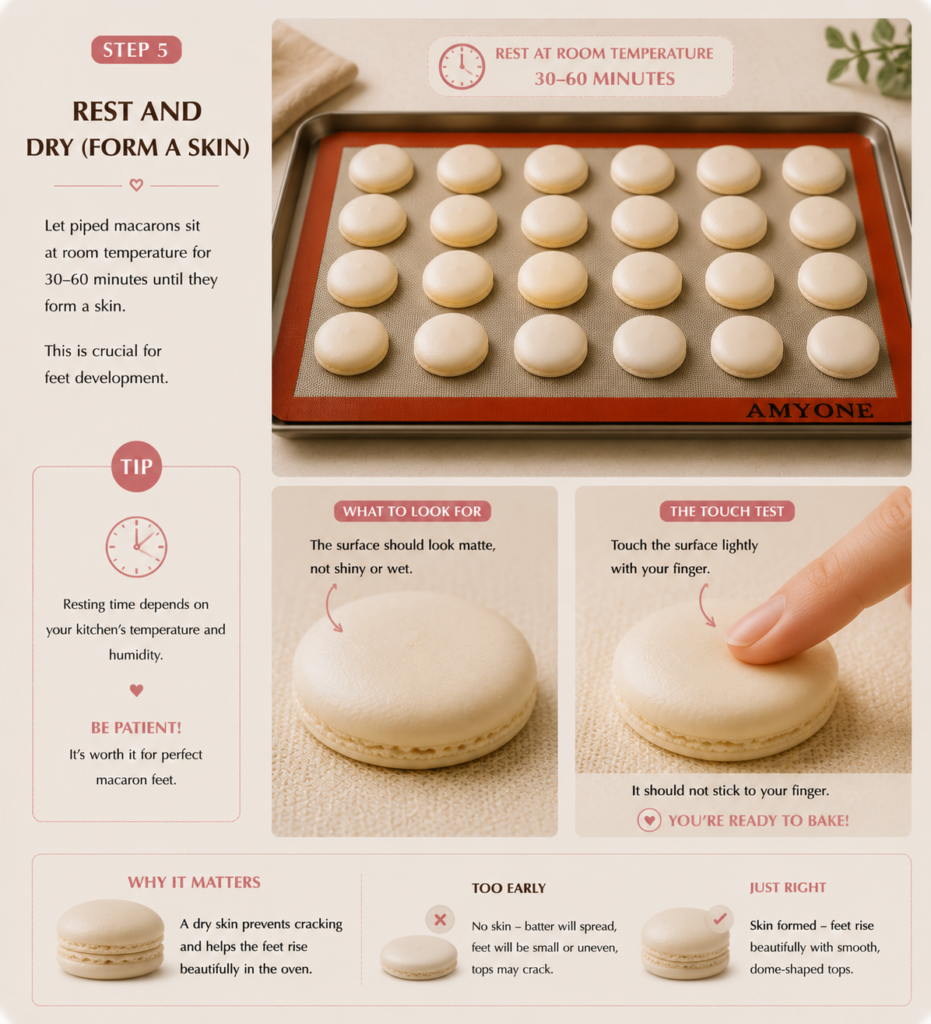
A: Most likely the batter was overmixed or the resting time was insufficient. Ensure your meringue is stiff and the macaronage stops at the lava stage. Also, let them rest until a skin forms.
Q2: Why are my macarons hollow inside?
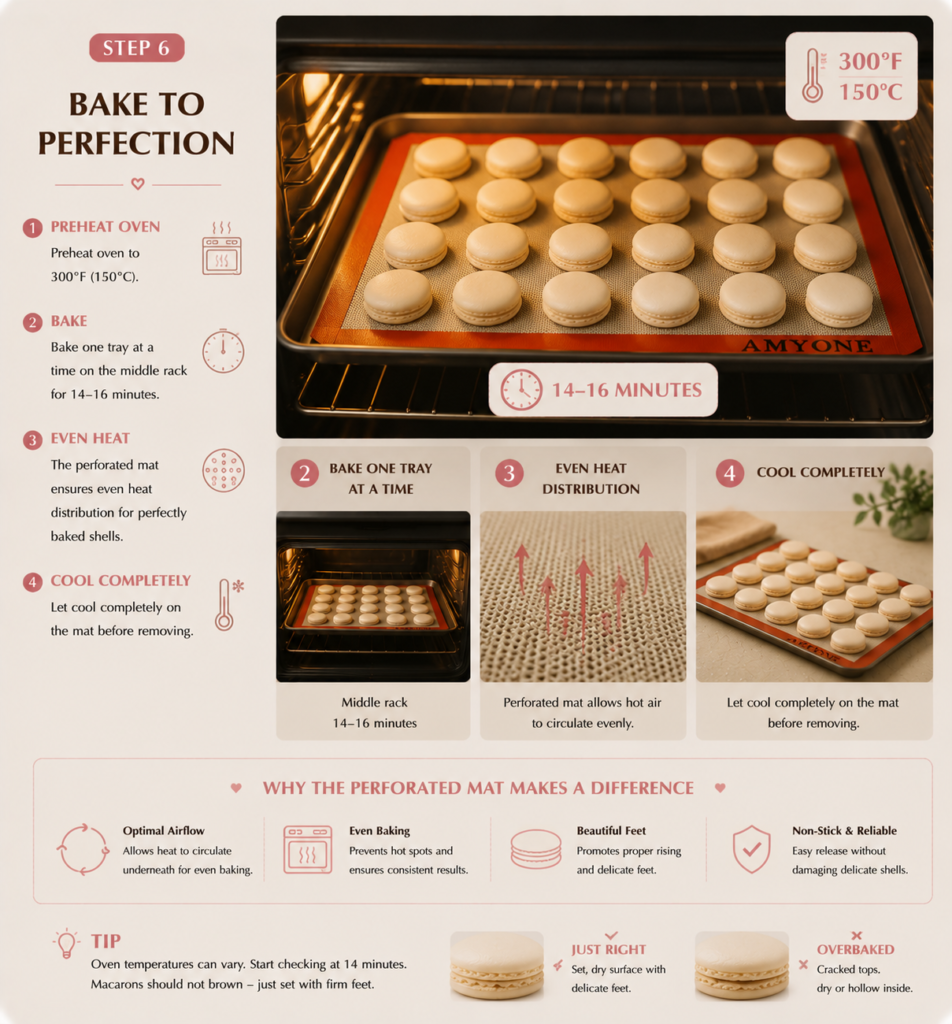
A: Hollow shells often result from under-mixed batter or oven temperature too high. Try lowering the temperature by 10°F and extending baking time by 2 minutes. Using a perforated mat significantly reduces hollow shells because it improves air circulation.
Q3: Can I use a regular silicone mat instead of a perforated one?
A: Yes, but results may vary. A perforated mat is specifically designed for macarons – the holes allow moisture to escape and heat to circulate, leading to better feet and fewer hollows. If using a solid mat, reduce oven temperature slightly and increase baking time.
Q4: How do I store macarons?
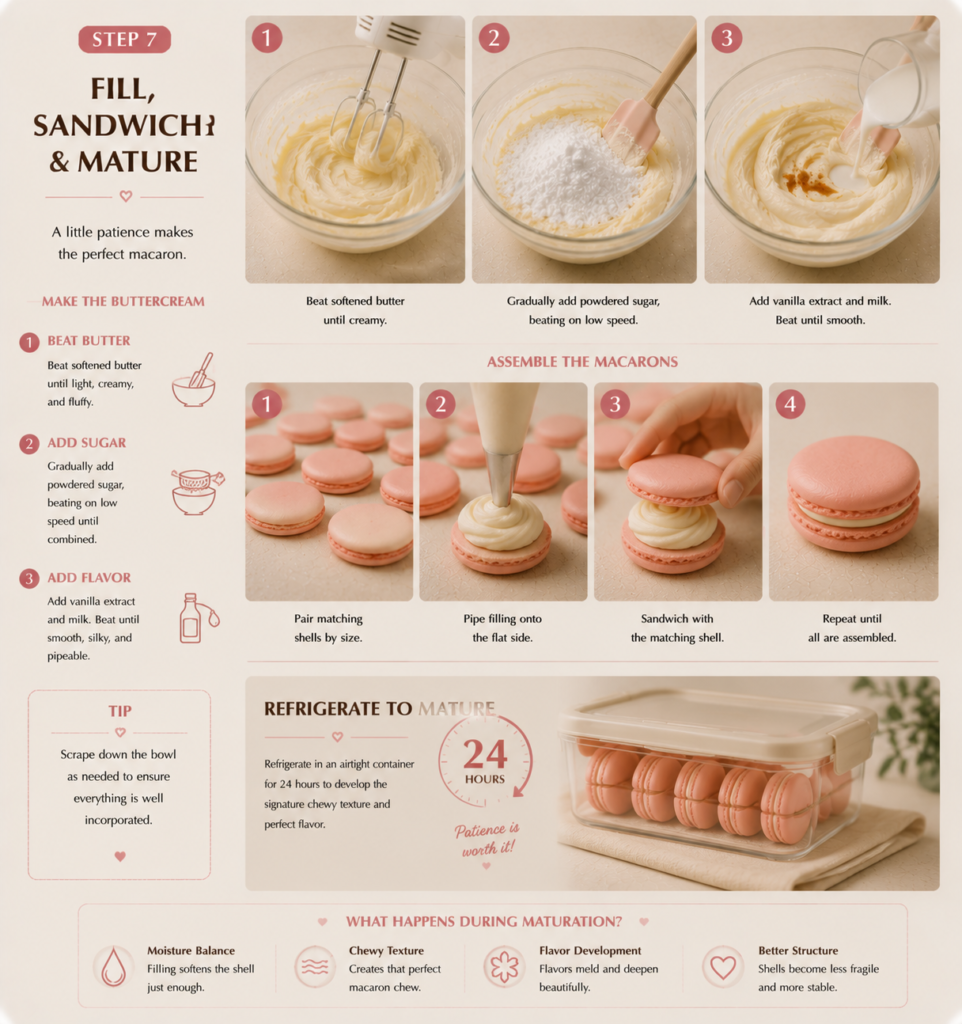
A: After filling, refrigerate in an airtight container for 24 hours. They actually improve after a day! For longer storage, freeze unfilled shells for up to 3 months.
Q5: Why did my macarons crack on top?
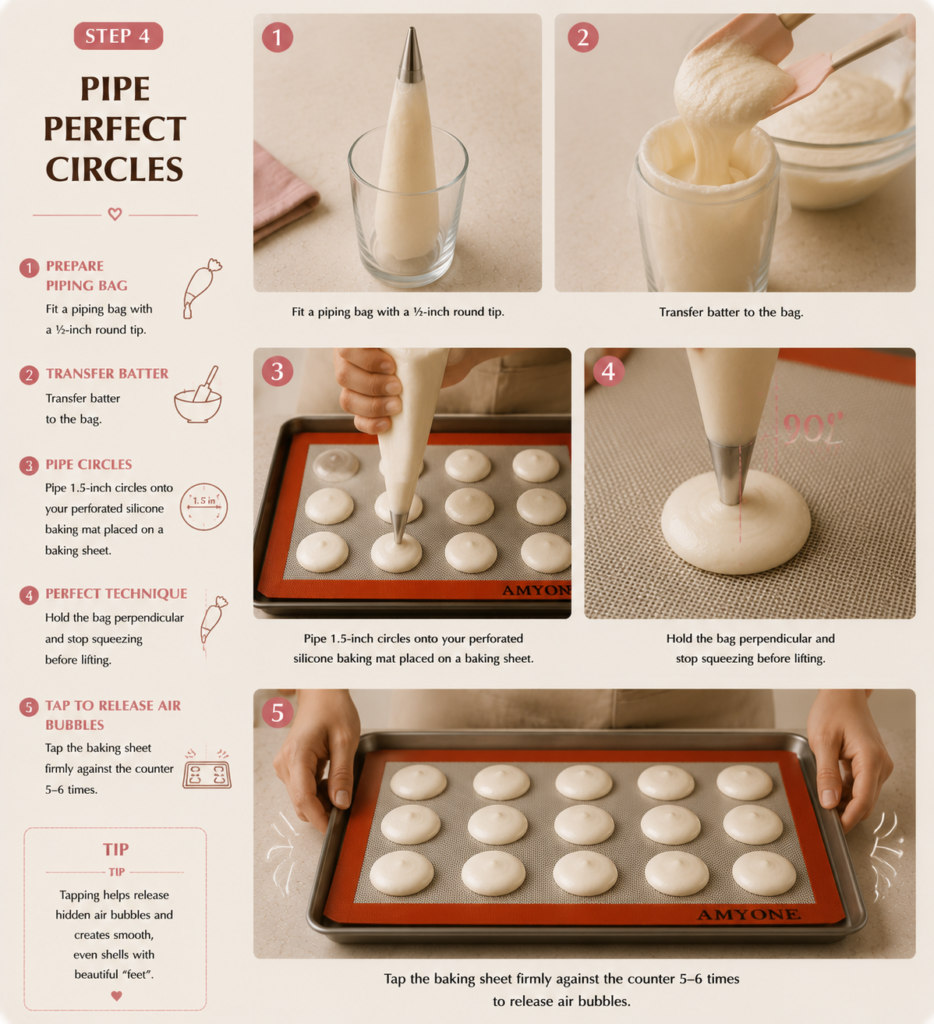
A: Cracking usually means the meringue was too stiff or the oven temperature was too high. Also, make sure you tapped the tray well to eliminate air bubbles.